Pros:
User-friendly interface designed for beginners.
Includes both automatic and manual tools for flexibility.
Offers additional restoration features like blemish removal and color correction.
Cons:
Requires a subscription for full functionality.
Limited batch processing capabilities.
Not a cloud-based solution, requiring local installation.
As a professional photographer and software expert, I prioritize software with robust dust and scratch removal algorithms, precise control over editing tools, and compatibility with various image formats. The software should offer both automatic and manual restoration options, allowing for flexibility in addressing different levels of damage. Additionally, a user-friendly interface and efficient performance are crucial factors in selecting a reliable dust and scratch removal tool.
Paul
Features
After removing scratches, stains, date stamps, etc., you can also use the editing program to process your image.
Image Correction
No photo can be restored entirely without slight brightness, contrast, and white balance adjustments.
Clicking on the Image Correction option in the toolbar will give you different lighting adjustments like contrast, tint, gamma, and temperature.
You will not have to open any other software to get the perfect exposure!
There is also an Auto Correction button, where the program adjusts the parameters to give you the correct exposure and white balance.
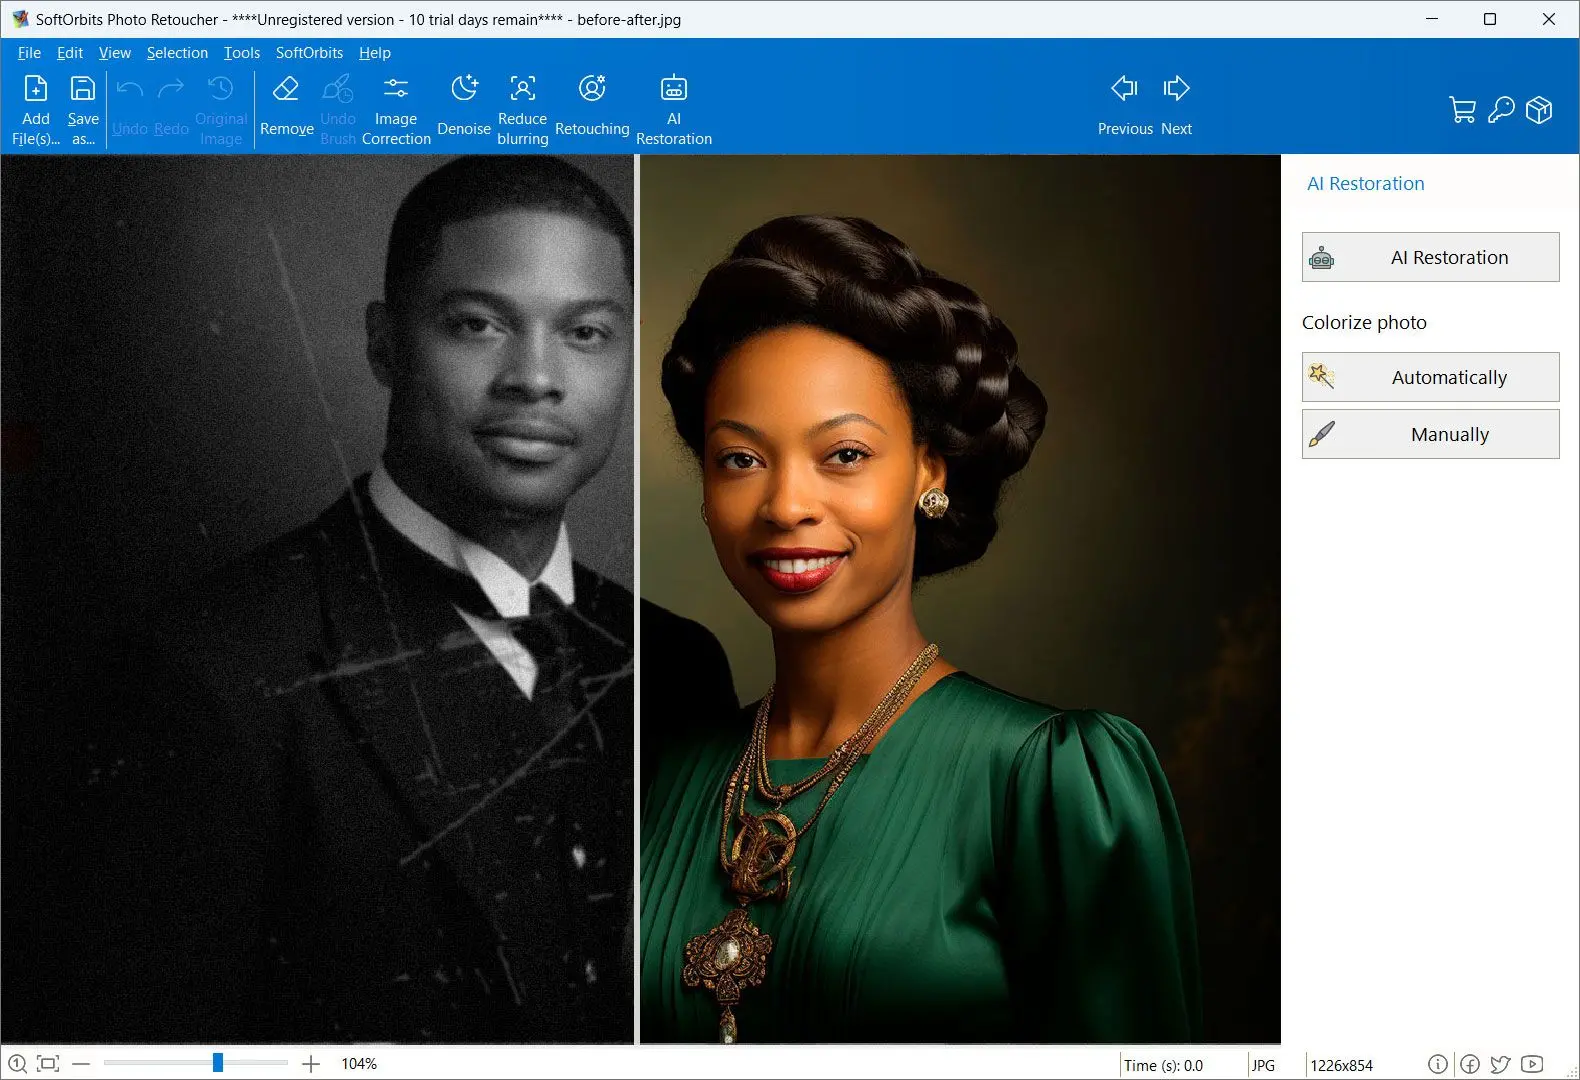
Colourize Option
Photo Retoucher also comes with an automatic colorize option. You can find this option under the list of tools on top.
No matter the black-and-white image, the program will analyze the areas and fill them with different colors. Adding colors to a faded photo will bring it back to life!
Manual Cleaning Tools
Some areas may not be removed in one go with highly damaged images. In such cases, you can try using the following three options for restoration, which offer more control over how the spot will be removed:
Clone Stamp Tool
Clone stamp features are a boon for photographers because they let you replicate a part of the image over another part. You can duplicate a flower or bokeh in your photo or cover up any damaged area with a clean one.
Photo Retoucher has a Clone stamp tool in its toolbar. You can manually choose the area used to cover the scratch or stain.
How to use clone stamp:
- After opening the photo, select the Clone Stamp icon from the toolbar. Your mouse pointer will now look like a cross.
- Now you have to select the good area – which will be cloned and used to cover up whatever part of the photo you wish. Before making this selection, do not forget to adjust the brush size. You must increase the brush size if you want to clone a large area, like some seashells in your beach photo.
- While holding down the Alt button, left-click on the mouse and brush over the area. For restoring an old photo, you must select a clean area that matches the background of the damaged area.
- Once you are done cloning, you need to stamp that over the bad part of the image. Release the Alt key, right-click with your mouse, and start moving over the bad part.
- As you click and paint, you will see that the selected area is replicated over the image's bad area.
This method is very effective for cleaning minor scratches which have damaged different parts of the image. By selecting other areas to clone – as per the background color – you can cover up the scratch in small steps!
The clone tool, as it is known in Adobe Photoshop, Inkscape, GIMP, and Corel PhotoPaint, is used in digital image editing to replace information for one part of a picture with information from another part. In other image editing software, its equivalent is sometimes called a rubber stamp tool or a clone brush.
Wikipedia
Smudge Tool
As the name suggests, you can use the Smudge tool to blend and blur a part of the image with it's surrounding.
By simply clicking on the affected area, you can blend the spot into the background and make it less visible.


 SoftOrbits Photo Retoucher